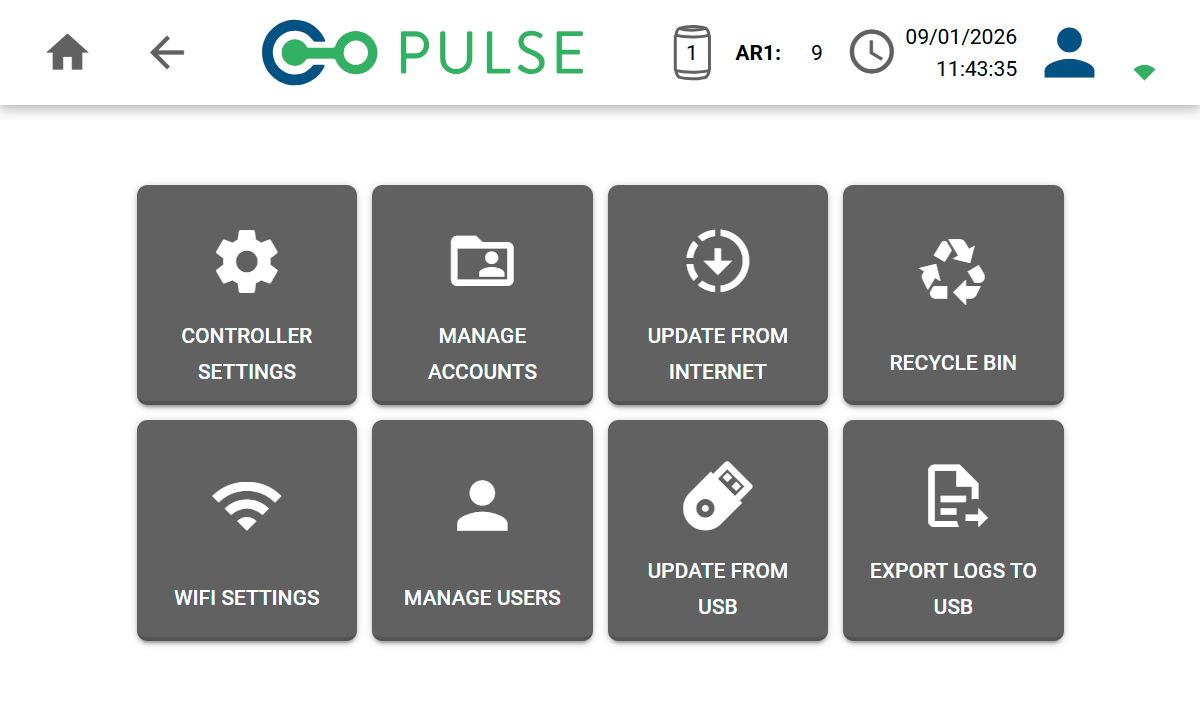
Controller settings
The Controller Settings allows default settings, regional information and support/diagnostic options to be configured.Defaults
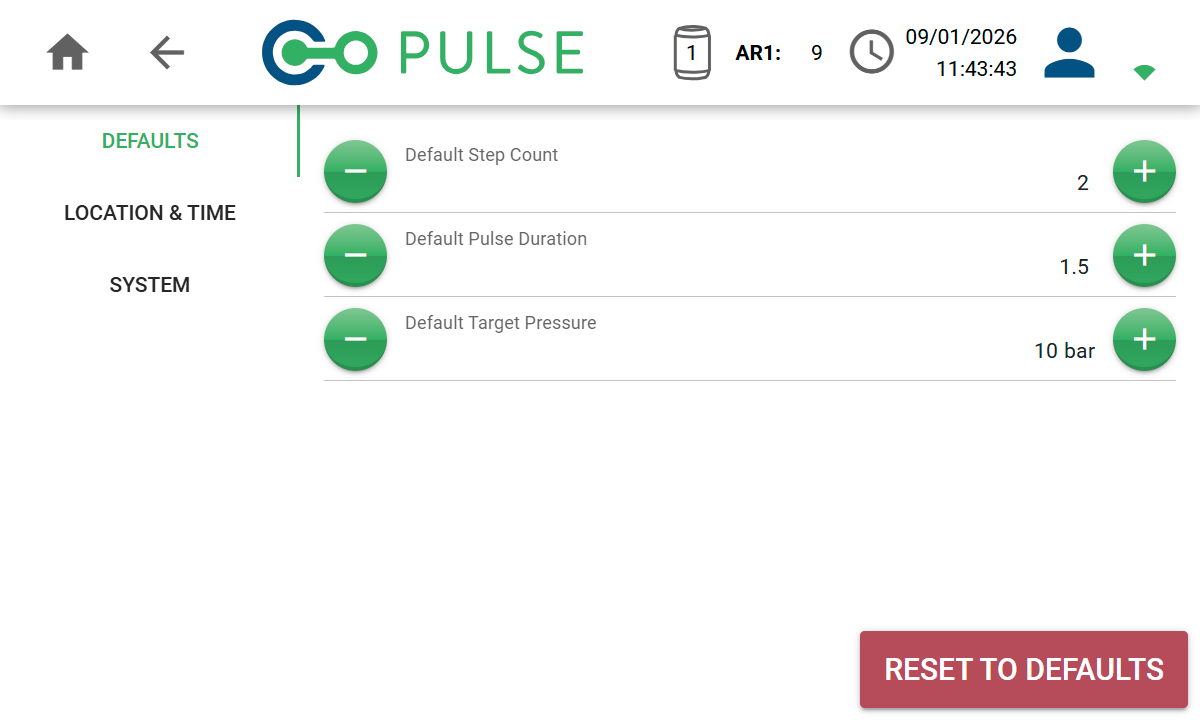
Default step count
Set the number of steps used during a Pulse test cycle. This defaults to a 2-step test.
Default Pulse duration
Set the duration (in seconds) that the main release valve will be open for at each step of the test cycle.
Default target pressure
Set the target pressure (in bar) that any connected air receivers will be charged to.
Location & time
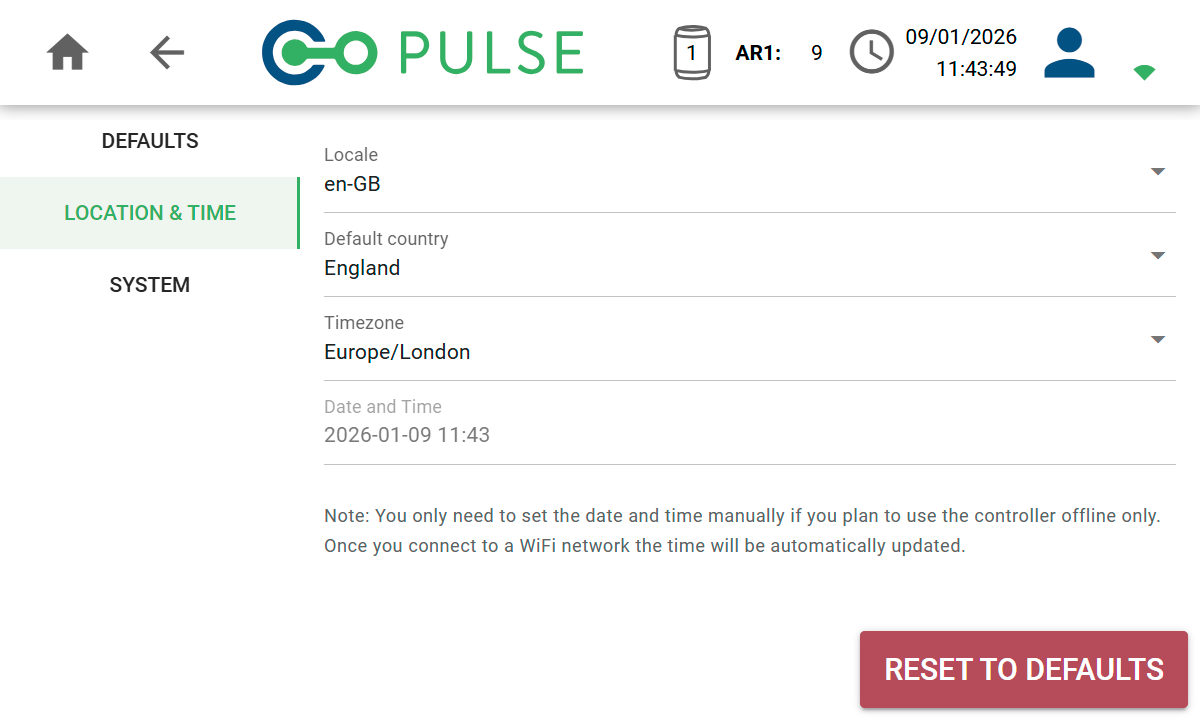
Locale
Sets the display language as well as the date/time and number formats used.
Default country
Sets the country that will be selected by default when adding a property address manually.
Timezone
Sets the timezone that all times will be converted to. Times are always stored as UTC but can be converted to your local timezone.
Date and Time
Enables you to set the date and time on the controller when you are not connected to Wi-Fi.
System
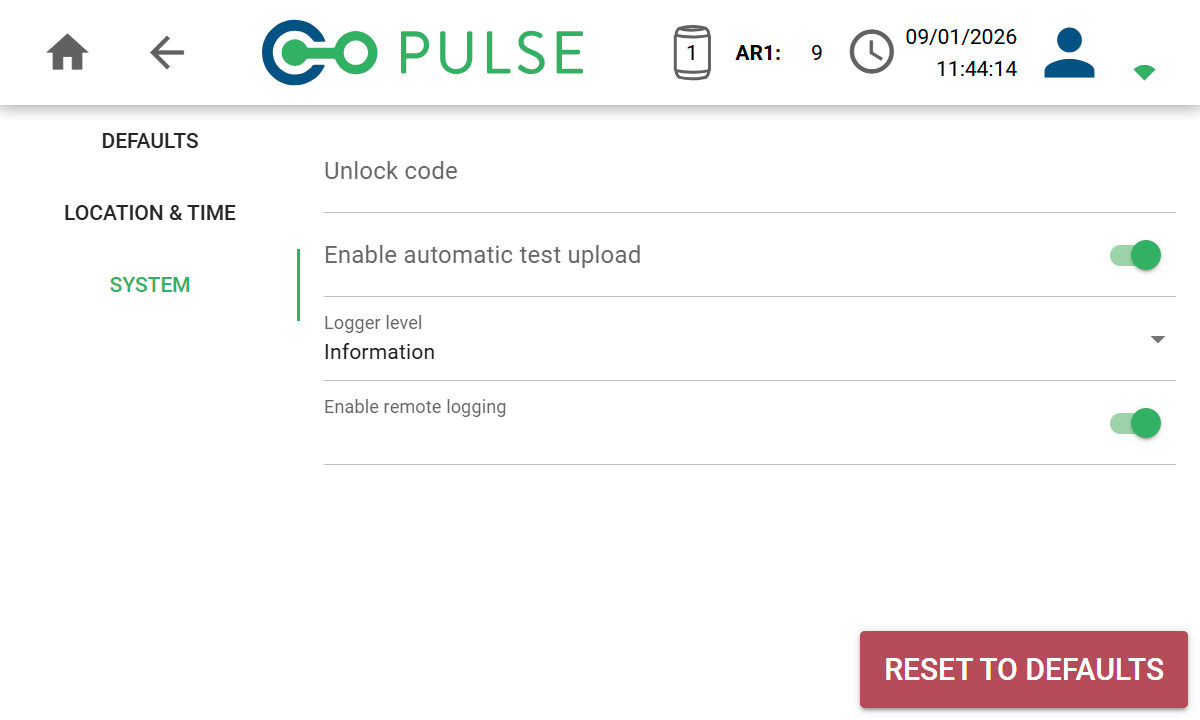
Unlock code
Entering a unlock code enables access to administrative and debug features to be turned on.
This will only be used when you are requested to use it by our technical support team.
Enable automatic test upload
Toggle on to automatically upload each test to the cloud as soon as it has completed.
Logger level
Sets the level of logging detail used in log files. Administrative use only.
Enable remote logging
Toggle on to send logging and diagnostics information to our technical support team.
This is essential to help our technical support team remotely debug any issues.
Wi-Fi settings
The Wi-Fi Settings page allows you to manage saved Wi-Fi networks as well as connect to a new Wi-Fi network or mobile hotspot.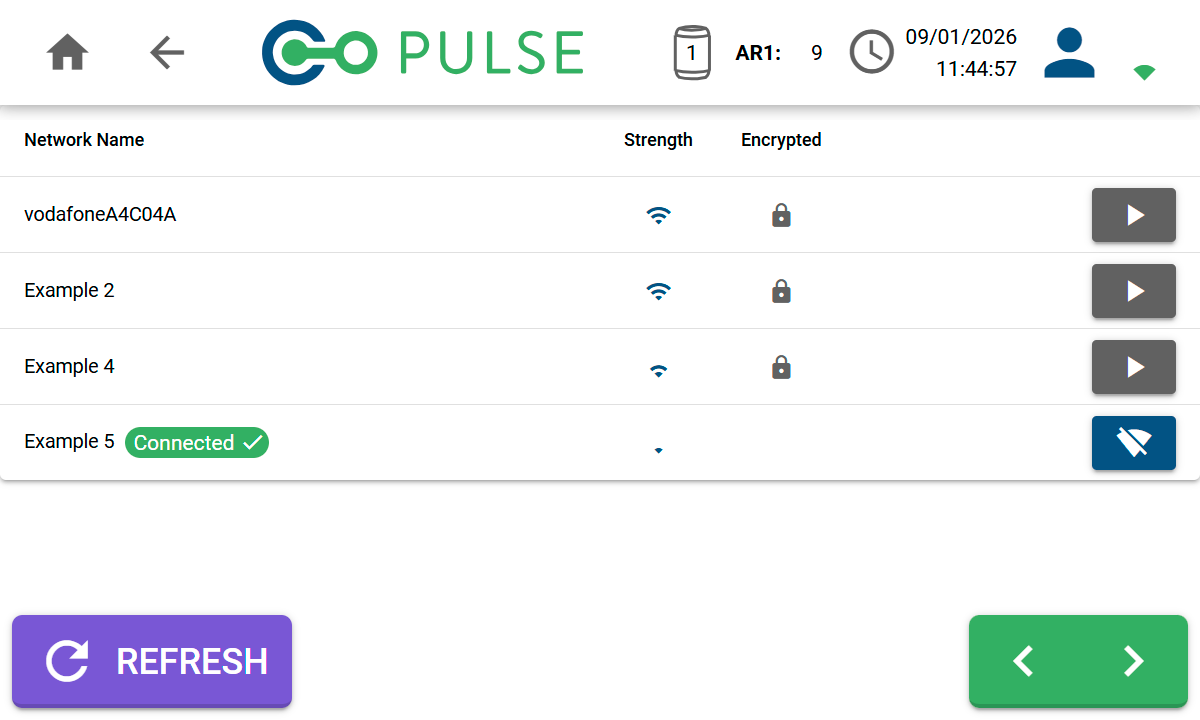
| Icon | Description |
|---|---|
Connect buttonClick to connect to this Wi-Fi network. If a password is required you will be prompted to enter it. | |
Disconnect buttonClick to disconnect from this Wi-Fi network. The password will be stored so you can reconnect at a later date. | |
Forget buttonClick to forget this Wi-Fi network. You will need to re-enter the password to connect again. |
Manage accounts
Online users may have access to more than one cloud account. The Manage Accounts page allows you to select which account you want to use. The Test History screen will only shows tests that were done using the selected account.
Manage users
The Manage Users screen allows you to edit or delete other users that exist on this controller. Both online cloud users and guest users will be displayed.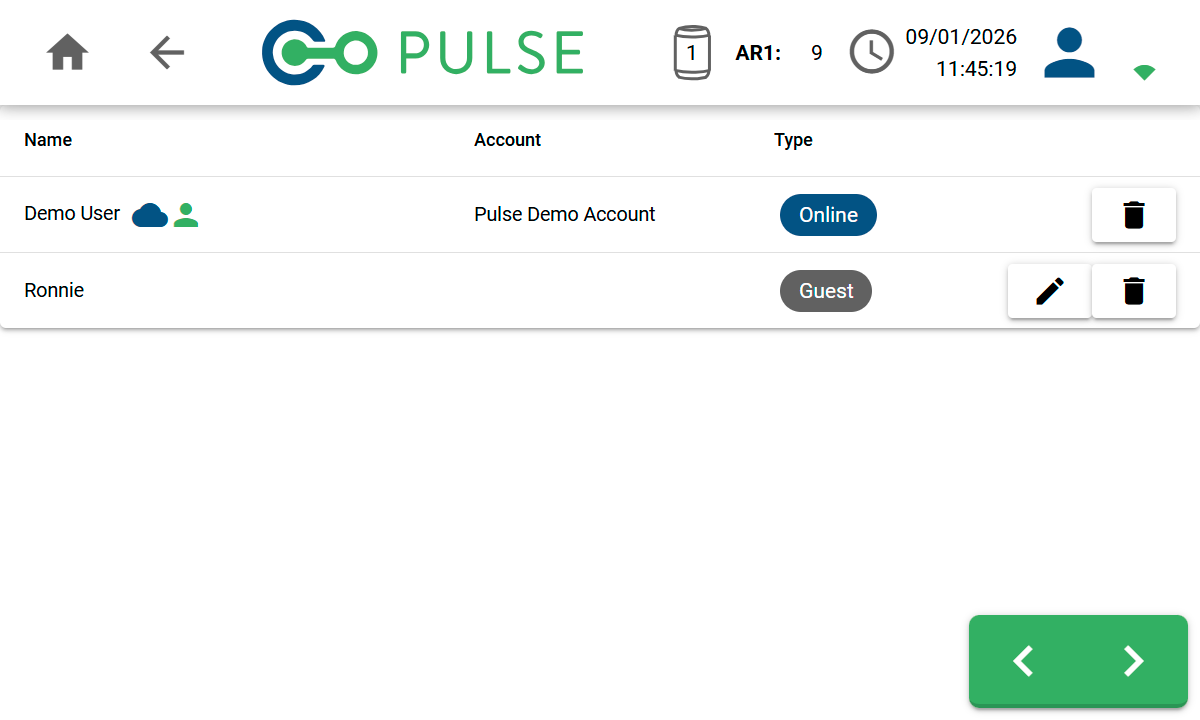
| Icon | Description |
|---|---|
Cloud iconIndicates this user is a cloud account. | |
AccountIndicates this is the currently signed in user. | |
Edit buttonClick to edit the name of the user. Only visible for guest users. | |
Delete buttonClick to delete the user and remove them from the device. |
Deleting a user will also remove all tests from the device belonging to that
user.
Update from Internet
When a new version of the controller software is available, the controller software will automatically prompt you to update to the latest version during boot up. It is also possible to check for software updates on the Update from Internet screen. Follow the on-screen prompts to update your software.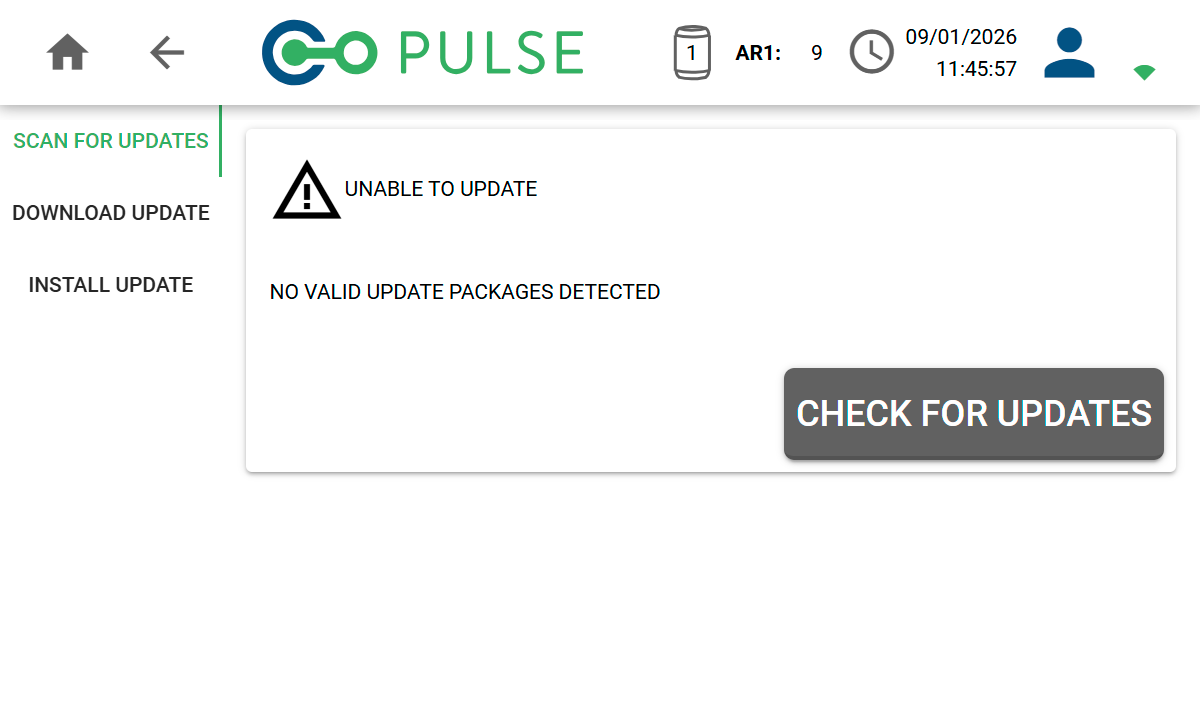
Online software updates require an active Wi-Fi connection.
Refer to online updating via Wi-Fi for more information.
Update from USB
Manual software updates can also be performed using a USB flash drive. Firstly, download the latest software build from Pulse Online and copy it to the root folder of a USB flash drive. Whilst on the Settings screen, insert the USB flash drive into the Data socket on the controller. This will enable the Update from USB screen to be accessed, where you can follow the on-screen prompts to update your software.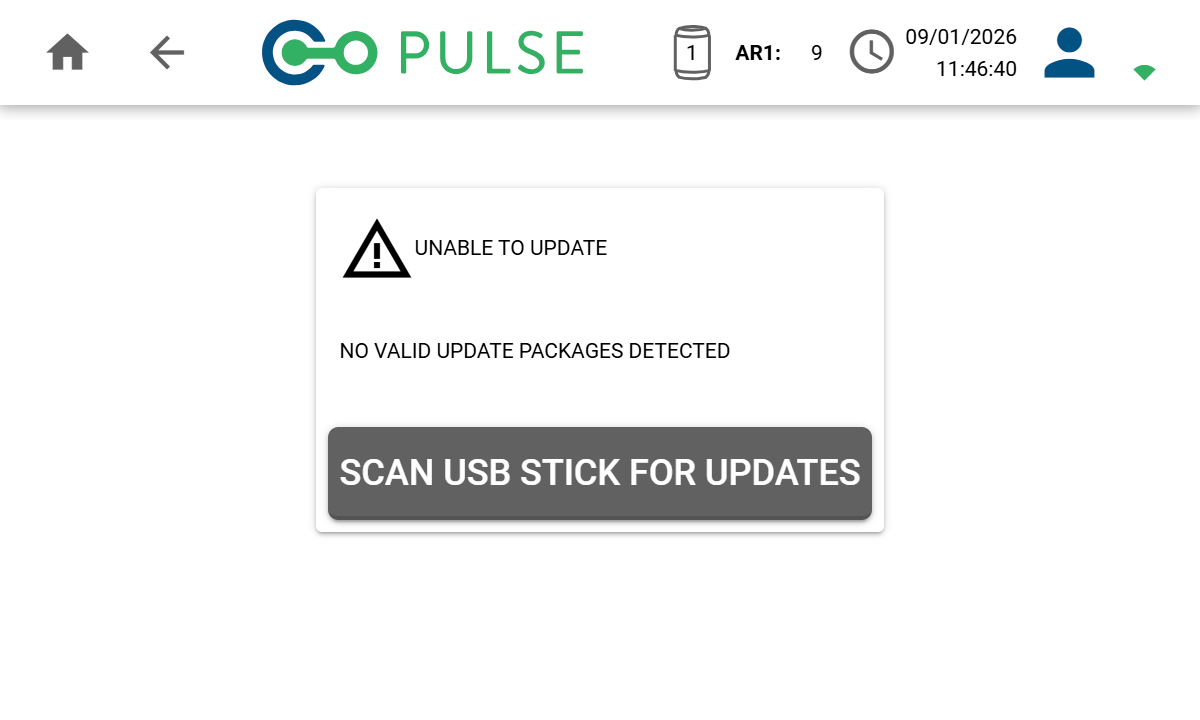
Refer to the manually updating via USB flash drive for more information.
Recycle bin
When a Pulse test is deleted from the Test result or Test history screens, it will be moved to the recycle bin. The Recycle Bin screen can be used to restore/undelete these tests or alternatively delete them permanently.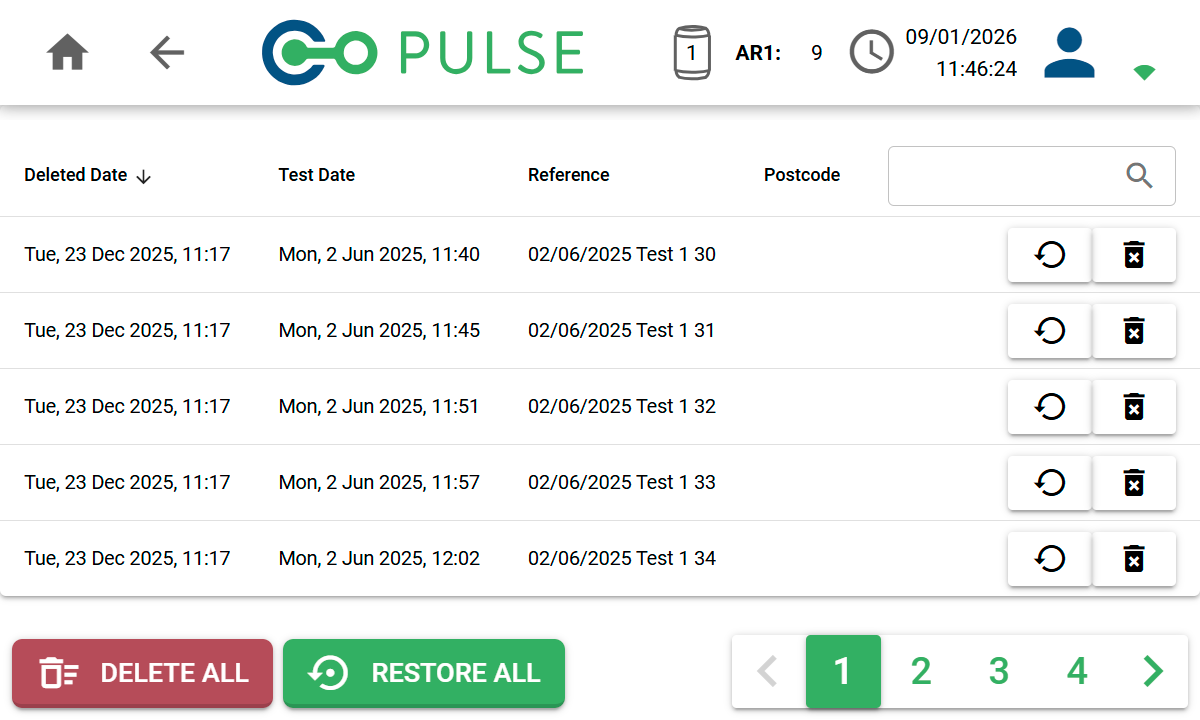
| Icon | Description |
|---|---|
Restore buttonClick to restore this test and move it back to the Test History screen. | |
Delete Permanently buttonClick to delete this test permanently. |